Premium Insect Screen: Keep Bugs Out with Our Effective Solutions – Hon&Guan
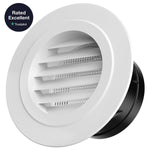
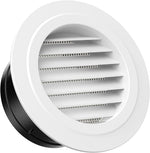
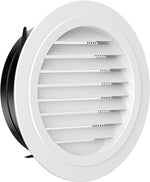
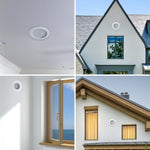
Air Vent Louver with Insect Screen
insect screen
Air Vent Louver with Insect Screen
insect screen

Air Vent Louver with Insect Screen

Regular price $6.99 Sale price $3.99
Shipping calculated at checkout.

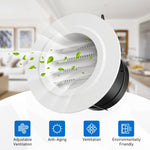
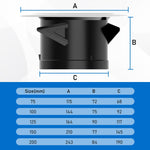
  • Louvre air vent make of high quality ABS.
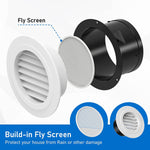
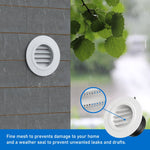
  • Extractor vent outlet has a fine mesh to prevents mouse birds from entering your home and a weather seal to prevent unwanted leaks and drafts.
  • Panel and black sleeves are detachable,easy to clean and maintain.
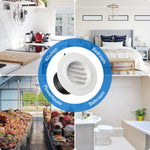
  • Wall mounted or ceiling mounted,perfect for bathroom,office,room exhaust and ventilation use.

Customer Reviews

Based on 7 reviews
71%
(5)
29%
(2)
0%
(0)
0%
(0)
0%
(0)
C
CuriousJay
Saved myself $$$ for a pest tech visit to eradicate wasp nest in house attic

I get a small wasp nest in my attic every spring/summer. This time the nest was too scary to ignore so for $265, a pest tech came out and eliminated the nest. Bought The Aluminum Louver with Insect Screens for my attic vents to eliminate the future fear and need for a pest tech to zap the nest annually....I used liquid nails to glue the screens in place. Some fit snuggly, some benefitted from being glued in place......having peace of mind has no price tag.....no more wasps....yeah.....

S
Speed
Cheap and meets code

Just what I needed, cheap and fits. For people wanting to know the screen in the inside pops out if you seem to think it is what is restricting the air flow.I installed this in stucco so it was more difficult than most jobs. Placed the vent below the intake to create a strong down draft and avoid moisture build up. If installed correctly it works good.Painted it brown to match the house.

G
Gnatty77
EASY!! Add a vent anywhere!

I needed a way to ventilate a small, cheap greenhouse with a poly cover and one door. I outlined the small end of the vent on cardboard which I then used to cut a 1/4 inch SMALLER circle. (So the vent would fit snugly when attached.) I then traced it onto the greenhouse plastic cover. I punched a small hole in the middle of the tracing using scissors then cut from the the middle out into what would look like a ��plus�� sign, leaving the flaps attached. In between each previous cut, I made additional ones going toward the outside. (Like an asterisk.) So in the end, I had a 5 3/4 inch hole w a bunch of little flaps hanging off around it. The vent has 3 angled pieces of plastic on the part that would go on the inside. (Look at their provided pics closely) I am assuming is to help keep it attached to whatever it��s applied. I easily bent and broke them off. I then easily pushed the vent through and then from the inside, used GG Patch N Seal Waterproof Tape to hold the plastic flaps down and taped around the piece of the inside vent. If the flaps are a little too long, cut them down but leave enough to attach tape. I could��ve secured the vent from the the outside too w even more tape but chose not to so that it didn��t look too patchwork. This was so easy to install. I��m sure it would��ve been even nicer had I used something other tape to attach it but I didn��t have much choice. The inside screen should do a good job keeping bugs out too. I have absolutely no experience doing anything w tools, home repair, etc but installing this vent couldn��t have been easier. I��ve already ordered 3 more to add even more cross ventilation.(The clips were used simply to hold the greenhouse cover tight so I could apply the tape from the inside a bit more even. This was a job that had to be done completely alone.

S
Steven
Worked for 5 1/2 inch mickey mouse vent hole.

I bought this 5" vent to cover a 5 1/2 inch hole made in concrete that was circular in shape but the bottom had been worked flat so the opening wasn't entirely round. Not only did it work for my odd size hole, but the outside was easy to trim to tuck under edge of the rocks. The black fins helped snug up the difference between the black plastic at about 5 inches and the concrete hole that was about 5 1/2 inches. I secured it with a little caulk, hope it keeps mice and cats out. It would look a lot better if I lined it up before cutting.

J
Jade L.
Easy to install.

Super easy to install. No screws necessary. Just need a 4" hole in soffit and you can vent your shower/bath condensation to outside your house.


Top
Sale

Unavailable

Sold Out